Now to look at the stock.
I got a little aggressive with the belt sander.
There is a lot of wood on the 180 stock.
More sanding.
It cleaned up ok, although there are a few problem areas.
A light coat of cherry stain, then repeated applications of tru-oil.
So the valve body o-ring groove has been machined?
It seems wrong to have an o-ring there without backing.
So I added a smaller one behind it.
The original breech plug went back in and it needed a spacer.
I reassembled the trigger.
Because of all the sanding I did, the post stood proud of the stock. Notice a small amount of breakthrough into the spring recess...
So I drilled out the trigger guard to slip over the post.
And got out my drawer of shim washers.
A spring washer will do the trick.
Works like a charm. It's important that the action not be loose at all in the stock.
All back together. It shot between 575-515 fps over 20 shots at 50 degrees. The last 10 shots fell below 500. It's a bit slow but a lot of that may be the temperature. We'll see if it gets faster in the summer. I thought I'd find a suitable butt plate at the gun show but didn't see anything. So that still needs doing.
Friday, March 12, 2010
Thursday, March 11, 2010
Another Crosman 180, Part 2
On I go.
I removed the sling swivels.
And the butt pad.
The rear sight has to come off.
Unscrewing the bolt handle screw.
Bolt and bolt handle.
The screw that holds the barrel down. The bolt has to be removed to access it.
Barrel separated.
It had a nylon tubing transfer port.
This screw holds the hammer.
The hammer unit.
Another post with no way of removing it.
Back to the 3 jaw drill chuck.
Unscrewed easily.
The spacer slid out.
This screw retains the valve.
And I pushed the valve out.
Odd...the o-ring looks too small.
The valve disassembled.
That o-ring has some problems.
It looks like he worked on the valve.
Wednesday, March 10, 2010
Another Crosman 180, Part 1
A customer asked if he could use his Crosman 180 towards the purchase of a lathe. An agreeable discount was achieved and I received this rifle.
The 180. Cross trigger safety.
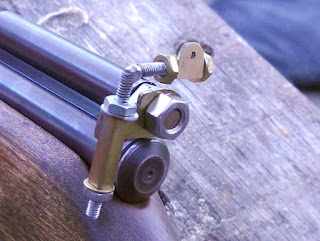
He made this inventive rear sight. I thought it was cool but unfortunately my hands are big and I couldn't grasp the cocking knob with it in place.
Another view.
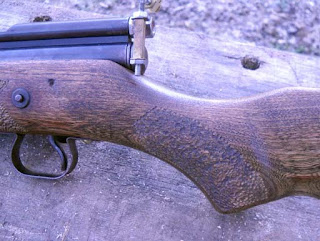
He also stippled the stock.
More stippling.
For some reason the wood around the trigger guard was uneven. I'll probably clean the stock up a bit.
Trigger guard removed.
Earlier Crosman 180 ( and 160, 400, etc?) rifles have this sort of trigger with the pin supported by the wood and a safety that prevents the trigger from being fully depressed.
The trigger.
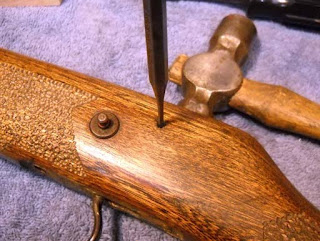
I pushed out the trigger pin.
The pin punch captures the trigger.
With the trigger removed you can see the trigger spring.
The parts.
This is the safety on "safe".
This is the safety on "fire"
Not really knowing how to get the safety out I just went at it with the pin punch against the stem of the safety.
I pushed it from the wrong side - the way I did it two little balls dropped out. If I had done it from the other side they would have been captured.
Punching out the other piece.
So three pieces, the left piece I don't know what it's called (the exploded drawing I have is illegible, it might be "safety click mphvwa") but the right one is called the "safety bushing". The left piece has internal grooves for the ball detent. The central piece is the "safety bar".
The 180. Cross trigger safety.
He made this inventive rear sight. I thought it was cool but unfortunately my hands are big and I couldn't grasp the cocking knob with it in place.
Another view.
He also stippled the stock.
More stippling.
For some reason the wood around the trigger guard was uneven. I'll probably clean the stock up a bit.
Trigger guard removed.
Earlier Crosman 180 ( and 160, 400, etc?) rifles have this sort of trigger with the pin supported by the wood and a safety that prevents the trigger from being fully depressed.
The trigger.
I pushed out the trigger pin.
The pin punch captures the trigger.
With the trigger removed you can see the trigger spring.
The parts.
This is the safety on "safe".
This is the safety on "fire"
Not really knowing how to get the safety out I just went at it with the pin punch against the stem of the safety.
I pushed it from the wrong side - the way I did it two little balls dropped out. If I had done it from the other side they would have been captured.
Punching out the other piece.
So three pieces, the left piece I don't know what it's called (the exploded drawing I have is illegible, it might be "safety click mphvwa") but the right one is called the "safety bushing". The left piece has internal grooves for the ball detent. The central piece is the "safety bar".
Subscribe to:
Posts (Atom)