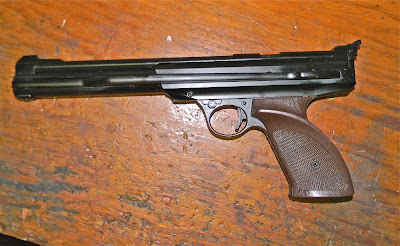
One of my friends sent me a Daisy 747 to have a look through. The valve wasn't sealing properly on the compression stroke of the lever. You can generally assume that's the problem when the air is coming out of the barrel during charging or immediately after.

It's Matt's 747!
The basic tear down is identical to the 717 and 727 guns that Nick and I have previously covered.
I cycled and dry fired it a few times. It was immediately apparent just how much better this adjustable trigger is compared to the trigger unit in my 717 model.
The adjustable piston head had the typical chewed up notches. Daisy should really make this from something more robust than a zinc die casting.
Left panel removed.
Pump lever removed.
The compression tube is aluminum. I'll have to check my older 717, but I think the older guns have brass tubes.
Piston head. I don't think this seal is bad, but it still gets replaced. We're this far, so why not? This o-ring is a #115, by the way.
Injection seam from the mold.
This flashing is the problem with using a die casting. I found pieces ranging from dust sized to this throughout the compression tube. Most of it was on the piston.
Chucked the head in the Taig and took a clean up pass to remove the seam. Also cleaned up the adjustment notches.
Here's the likely leak offender--the valve stem seal.
I stoned off the face of the valve both to square it up and remove any potentially loose casting material.
This o-ring seal is also not really suspect, but like the other, it gets replaced. And like the piston head seal, it's also a #115.
I used a grease on the o-ring seals. Should last longer than the oils that are typically used.
Matt supplied a repair kit when he delivered the pistol. The valve stem seal is an earlier design.
Looks like it's been sitting around for a while. It's probably 20 years old.
Fortunately, I bought several replacements from Daisy when I was fixing my 717. Because one is none and two is one...
New style on top, old on bottom. My guess is that they're actually interchangeable, but I'd prefer to take one more variable out of the equation.
Reassembly was simply a reversal of the procedure. Did grease the cocking linkage with moly as well as re-stake the cocking lever pivot pin. (It was so loose, it fell out of the cocking arm at one point) Not shown: Polished and cleaned up the trigger pull a bit more. After all this, the gun still had a tiny leak when initially charging the gun. Went back in and reseated the valve stem seal using some minimal pressure to get it to conform to the valve seat. A week and 100 shots later, there's not even a tiny hiss of air when charging--all the air is now going (and staying) inside the valve. I still
Really astonished at how superior this trigger is compared to the one in my gun. Looks like the grip frame is different as well as the trigger itself and trigger return spring. I'm calling Daisy and upgrading the parts in my gun next week. The 747 is absolutely worth the $40 premium it brings over the basic 717.
Thanks for checking in.


