On I go.
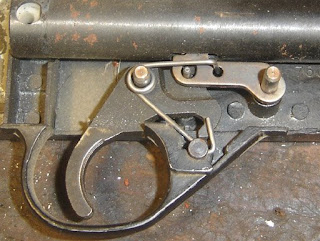
Always a good idea to take multiple pictures of the trigger group...the spring does double duty as safety detent and sear spring.
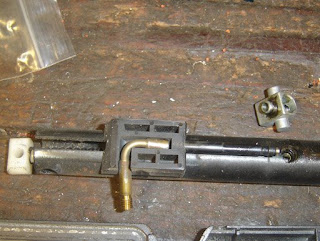
The aluminum transfer port unit was removed. The bolt assembly is plastic. There are 6 plastic parts on the rifle: bolt, front sight, bb loading port cover, stock fore and aft, and hammer plug. Compare that to the modern 760 which is mostly plastic.
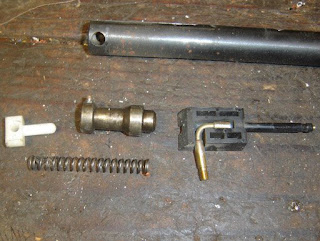
The hammer and bolt parts. Note that this is a knock-open valve system, earlier 760 models used a self cocking valve like that on the 140/1400/130 guns.
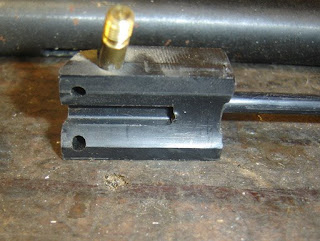
The slot in the bolt that cocks the hammer.
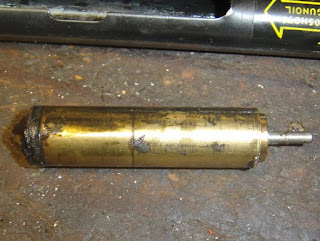
Dirty valve assembly. The one fault I noticed before opening up the 760 was that the inlet valve wasn't closing.
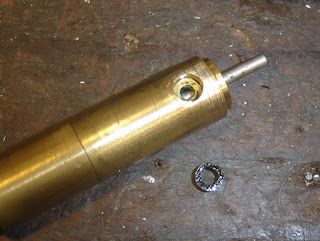
The transfer port seal.
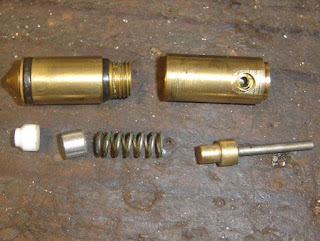
The valve. Notice the aluminum spacer between the spring and inlet valve. Later models just have a longer one piece inlet valve. I had spare inlet and exhaust valves and o-rings on hand as replacements.
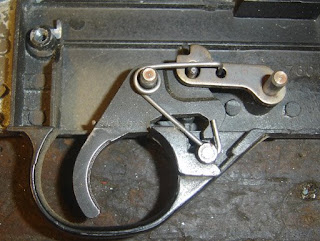
Heck, another picture of the trigger.
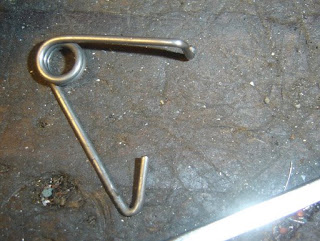
Spring. Notice the little hook that goes in the hole in the sear.
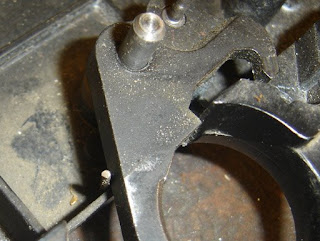
There's another spring under the trigger that hooks around the end.
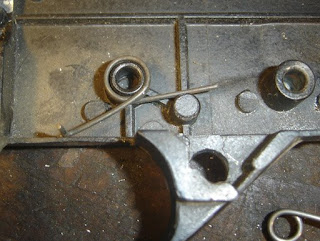
Always good to note.
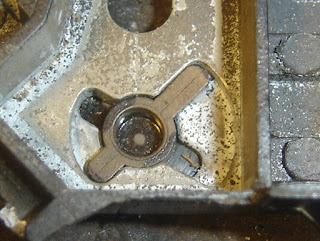
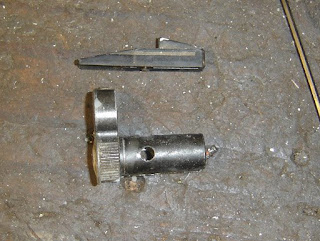
The bb loading port cover can be rotated and removed.
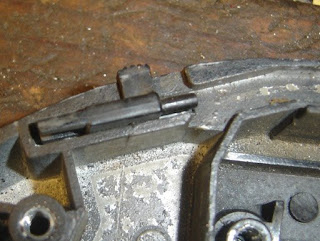
The "magazine" loading switch. I'd love to give the proper names for all these parts but the exploded diagrams don't always have them.
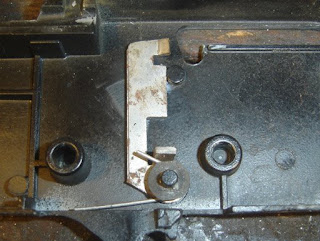
This part is fastened to the other part of the receiver. It prevents you from pulling the trigger when the bolt is open. When reassembling you have to have the bolt open to clear it. Reassembly and resealing had no surprises, just go in reverse.
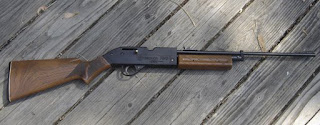
I repainted the receiver, cleaned the plastic stock. Polished the bolt. I removed most of the rust with steel wool and hit it with some Oxpho blue. The bad news is that there's a massive air leak around the transfer port unit/barrel. So I need to take it apart again and fix that. But hey, it looks pretty!
Saturday, May 30, 2009
Friday, May 29, 2009
Disassembling an early Crosman Model 760, Part 1
I decided to get the Crosman model 760 I bought last week into working order.
Hmmm, There's some sort of cap over the pivot pin.
Notice the surface rust. It appears the caps cover the roll pin.
A small pin punch removes a pin from inside the roll pin.
A tiny bit bent. A nice detail to cover up the ugly roll pin.
Now to remove that roll pin.
Punched it out. Seems there was a bit of wear in the pump arm pivot hole...just a bit...
Loosening the barrel band set screw. The barrel band is pot metal.
The plastic front sight and barrel band.
Removed the piston. It's steel with the same type of cup as on the modern 760.
Punched out the forearm roll pins and disassembled it all.
I have enough spare parts...found a replacement in my junk drawer for the one with the wallowed out hole. It's from an early 1377.
Another setscrew in the top holds the barrel on.
I removed three screws from the receiver.
Unscrewed the brass bolt knob.
Separated the two halves. Unlike the current model 760, nothing flew out and there was plenty of space inside.
Thursday, May 28, 2009
Crosman 180 Stock Refinish Part 2
Found a small block of walnut in the pile. There's a great lumber yard/mill work shop nearby that always has small pieces of walnut, cherry, chestnut, etc for cheap. If I see a good looking block or small plank, I'll add it to the collection.
This was the only walnut chunk I had that looked wide enough for both the butt as well as the forend tip.
Can't just trace the outline of the stock and cut. Remember that the toe continues the line outward.
Toe (angle on the left) has to be accounted for by leaving some extra wood at the bottom. The heel on the right is almost a straight cut.
Drew a rough idea of how the curve should look from the side. Gotta think a little bit in 3D before starting the saw. Cut the end off and set aside. That will be for the forend.
It's easiest to cut the curve for the shoulder first, as the block still has flat sides to set on the saw's table. Don't ask why I know this...
Good enough. A large sanding drum will be used to finish the curve later.
I took the corners down, as well. Less to plane or sand off later. Took care to leave enough for the toe of the butt.
Set a sheet of 80 grit garnet paper on a granite surface plate. Make the base as flat as possible to fit against the stock. I repeated this procedure on the gunstock as well.
I'm doing this quick and dirty. Eyeballed a couple stock screw holes, clearance drilled and countersunk.
Not shown: Used a transfer punch to mark the hole locations on the stock. Drilled the stock for the wood screws. Ended up using a couple deck screws. Not elegant? Well, they're strong
and have black oxide coloring. No need to blue. Did a dry test-fit then it was Gorilla Glue time.
Moving forward. Here's the excess walnut from the butt. Laid the 180 stock on top of the walnut block and traced the angle. A quick cut with the chop saw and I'm ready to sand.
Again, the granite block is used to get flat surfaces on the walnut and the stock end.
Used a ruler and drew 3 lines for reference. When gluing these together, they'll help with alignment. The lines are at 90 degrees from the cut on the walnut.
This is why I drew those 90 degree lines. I can set the base on the drill press table. Spotted and drilled a clearance hole.
Counterbored.
Transfer punched and drilled a hole in the stock. Used another deck screw to fasten the walnut to the stock.
Glued and drying here. Due to the angle between the wood surfaces, I thought it would be very difficult to clamp the parts together for the glue bond. The deck screw made this easy. After drying, the screw will be removed to inlet for the gas tube. If I got this right, the glue bond should be stronger than the surrounding wood.
More to come.
Tuesday, May 26, 2009
Crosman 180 Stock Refinish Part 1
The stock on the Crosman 180 is pretty...well, plain. It's hard to get excited about an airgun, firearm--anything for that matter--when you don't find it visually engaging. "Utility grade" is the kindest phrase I can find to describe the 180 stock. "Ugly as sin" also works.
Side left.
The flip side.
This isn't my first choice for a shoulder connection interface. Stocks look unfinished with this type of butt. Even a thin plastic butt plate is better than this. At least make it look like you tried.
No going back now.
A few minutes along.
There's some decent grain under that brown varnish. Took a bit over half an hour to strip the stock with a hand sander. Used garnet (as opposed to aluminum-oxide) paper. Faster cutting action and the garnet paper tends to last a lot longer.
Went down the street to my aunt and uncle's house to get some saw time.
Eyeballed it.
Looks pretty good. Now I have to fit either a recoil pad or a butt plate.
Ok, now I'm really committed. Guess I'll be making a new forend tip to match.
More to come.
Subscribe to:
Posts (Atom)