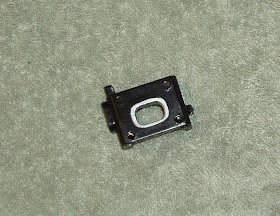
So here we go. Removed the tube, eyecup, and aperture.

Removed the dovetail clamping assembly. Note the two small springs: they serve only to push the clamping plate away from the dovetail to make installation and removal easier.

Removed the two tiny circlips on the bottom rear of the sight.

Unscrew the elevation knob--all the way out. I heard, but didn't see, the spring loaded ball bearing from the detent go bouncing across the room.

Fortunately, Nick sells an assortment of small bearings for just such an occurrence . Then I dropped the replacement bearing and heard it hit the floor. Third time was the charm. The bearing is a 3mm.

The sheet metal cover plate is removed. Pulled the bottom out of position first--over the pin--then disengaged the top of the cover.

It's a bit tricky to remove. I pried the edges up with a dental pick. Again, bottom first, then the top, then the plate was easily removed. It wasn't coming off without damage otherwise.

Sans cover.

Sorry about the blur. The long pin came out. This is a slide pin for the elevation.

I didn't need the pin punch for the elevation pin...

No pics, but there's another circlip holding the windage screw in place. Remove the circlip, then unscrew the windage adjuster. Look out! There's another 3mm bearing and spring.

Two plates. The threaded outermost holds the aperture. Had to use the pin punch to knock out a cross pin. It's a slide pin for windage. Sorry, the pic didn't come out.

Another pic for my orientation.

Here's the "window". It's too small on almost every side for my anti-glare tube to clear.

Silver sharpie says: "Remove about this much". This could also be done with a small file.

End miller time.

Milled all 4 sides. Didn't measure anything. This is all for clearance. Just tried to not accidentally cut it in half.
To fix that right-biased windage problem, I needed a bit more precision in the milling set up.

The dial indicator is on a magnetic base affixed to the bed.


Indicated on the base of the sight. Fiddled and adjusted until the dial indicator didn't move as I advanced the crosslide across the travel of the cut.

Lined up a small 60 degree dovetail mill and verified the depth.

Need to remove about as much material as the aperture was offset to the right. Just over 0.150".

Aluminum cutting fluid and some luck.

The unintended side effect--The clamping plate bottoms out before it's remotely tight on the gun. Just superb.

Milled out the recess for the plate, then switched to a smaller 0.125" center cutting end mill and got into the corners a bit more.

Finished. Now I just have to reassemble in reverse order. I did not drop any bearings on reassembly.
I'll throw a pic or two up of the whole IZH 61 as soon as I can get some real light. I'm shooting most of these at 10PM and later.
More soon.
I bought a similar sight. The dove tail on my rifle was slightly wider. Opposite your problem. I filed the long dove tail groove on the sight. Now it fits perfectly.
ReplyDeleteMy sight had a bump right above the pin right of the elevation pin. The e-clip below was placed inside the thin metal cover plate. It should have been outside the plate. This made the pin shoot above forcing a bump on the upper metal plate. I'm guessing the worker got lazy and found an easier way to assemble it.
ReplyDeleteI have 3 of these. The original Gamo sights from 1980s have the circlip fitted externally. These current ones are chinese copies and you can't get the circlip outside the tin. Better to leave it off and let the tin sit in the groove. Slack in the adjusting screws is the worst feature.
Delete