On I go…
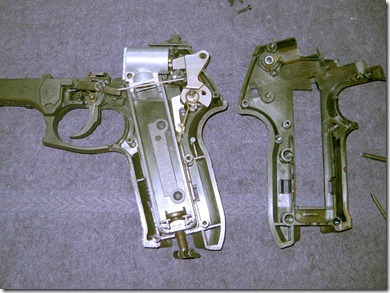
Grip frame halves separated.
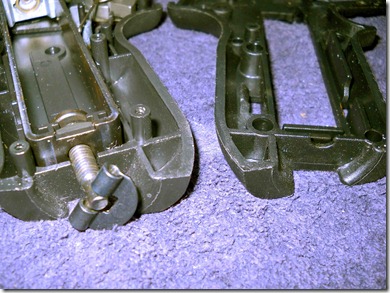
I had to lever the halves straight up as the posts on the right side grip frame are a snug fit in the holes on the left side. Notice the CO2 cartridge strap.
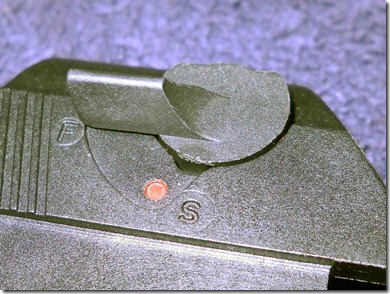
Safety, inside view.
Safety, external view.
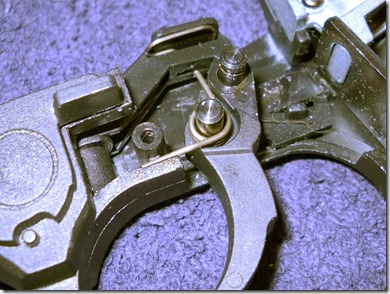
More parts. I replaced the end of the trigger spring where I think it goes.
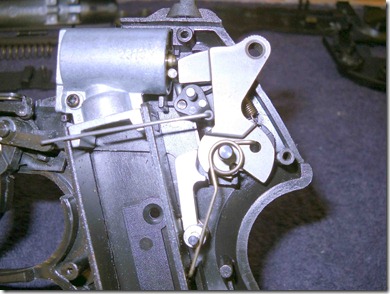
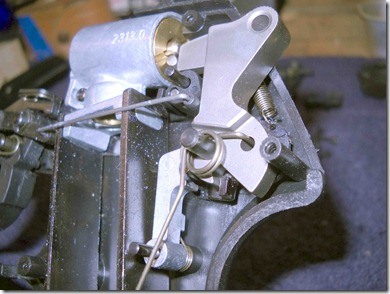
Notice the transfer bar that fits between the hammer and the valve stem when the pistol is fired. At rest it sits below. One screw holds the valve assembly to the right half of the frame.
Notice the piece below the hammer and the way the spring is tucked under a small boss. Notice the rectangular bosses that hold the CO2 Cartridge strap to the valve assembly.
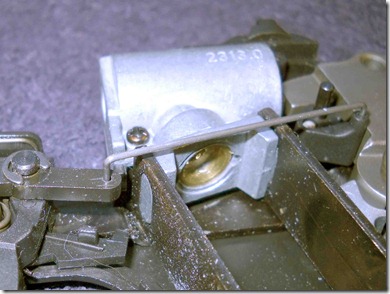
Wire arm. connects the trigger mech. to the hammer mech. Again notice the screw that retains the valve assembly.
Another e-clip.
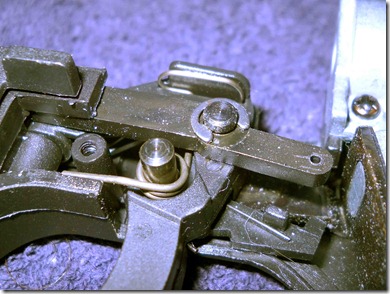
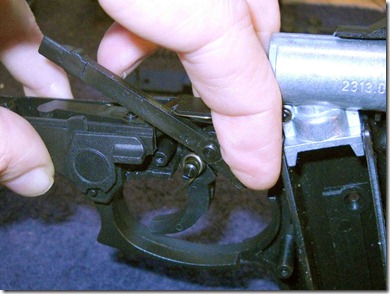
Once the clip is removed the sliding arm is pivoted up and then slides off of the pivot pin.
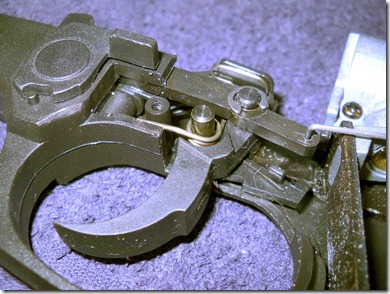
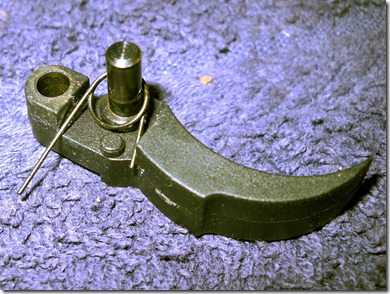
Trigger and spring.
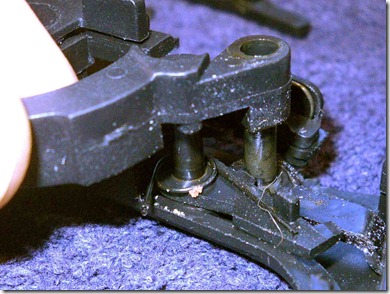
Pulling off the trigger, notice the smaller spring underneath and what I assume is the feed pawl for the rotary clip?
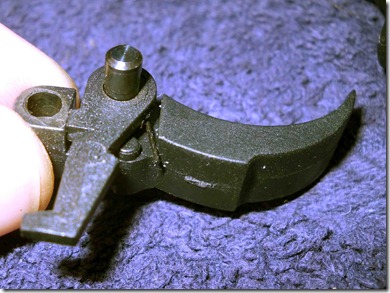
How I think the spring is retained by the trigger (this would be an underside view).
Pawl removed.
More to come…

Hi,
ReplyDeleteDo you make a custom made valve to increase the power for PT-80, i would like to buy one if you are willing to sell.
Thank you for the pictures. Very good instructions, Thanks
ReplyDeleteI don't know if you'll be seeing this, but I'm currently having trouble with my PT 80. The trigger spring looks just like it does in your first image. But looking at the replacement you made it looks nothing the same. I opened my pistol and now I cannot figure out how it should be placed. I'm hoping for some assistance!
ReplyDeleteI didn't make a replacement, there are two springs around the trigger, the trigger spring and the spring for the pawl.
ReplyDeleteOkay. It's just that, if you take a look at this image:
ReplyDeletehttp://lh6.ggpht.com/_aNjK3CTQ0DE/TKS6_TAAk2I/AAAAAAAAL0Q/oVeMNIYnIfU/s1600-h/09301016%5B2%5D.jpg
See how the trigger spring is there, and then how it is here:
http://lh6.ggpht.com/_aNjK3CTQ0DE/TKS7GxoGd1I/AAAAAAAAL0w/85nnepwA23Y/s1600-h/09301020%5B2%5D.jpg
I just cannot manage to get it that way. I can put it there by force but the trigger will be misplaced (leaning forward too much) and it would be hard to put the pieces back. I would only like to know how you achieved the second image starting from the first; how to get the trigger spring into position!
Yes, guns like this can make you go crazy. In the first pic the spring is misplaced due to the halves being separated. As to how I got it back in place I'm not entirely sure, it was a while ago. Just take some time to really understand how all the parts work against each other and eventually it will all make sense.
ReplyDeletewell did you figure out how to increase the power in the pt80?id like to see a full 475 fps or close to that
ReplyDeleteDo I need to take my pt80 apart to change the co2 seal ?
ReplyDeleteGreat explanation and pics ... the best I have seen yet
Do we have to use gamo co2 cannisters or can we use the crosman ones?, as they have lubricant in them
ReplyDeleteThanks
Yes, you need to disassemble it, AFAIK, and no you don't have to use only GAMO co2, AFAIK.
ReplyDeleteYes, you need to disassemble it, AFAIK, and no you don't have to use only GAMO co2, AFAIK.
ReplyDeleteThere is a gold o ring around the co2 intake valve, do I need to remove this then clean out the old seal ... if so how do I remove the gold o ring, thanks
ReplyDeleteRead the next blog post in the series. I did remove it, but it would be better if you don't, probably.
ReplyDeletehttp://anotherairgunblog.blogspot.com/2010/10/gamo-pt-80-co2-cartridge-seal.html
Cheers, im still struggling ...
ReplyDeleteI have put it back together about a hundred times but when I fire the trigger spring and the wire arm keeping jumping out ... any ideas
It's either because something is broken or you are not quite putting it together correctly.
ReplyDeleteCan you remember if it went back together with the saftey on or off ?
ReplyDeleteAm I better with a Crosman ?
I have no recollection. I don't know if you're better off with Crosman, but quality airguns have mostly metal parts, not plastic.
ReplyDeletehi, maybe somebody know where i can buy PT 80 trigger???
ReplyDeleteMy trigger fires but doesn't go back forward which spring do I need to replace?? Thanks
ReplyDeleteMy trigger fires but doesn't go back forward which spring do I need to replace?? Thanks
ReplyDeleteYou need to replace trigger spring (bigger one of the two on the trigger) or make sure it is correctly seated. I have managed to figure out this gun and get it back together (really not easy) I have replaced a few parts including the index arm but the gun still doesn't index correctly. Anyone know which other part might help with indexing?
ReplyDeleteFor anyone struggling getting the gun back together.
ReplyDeletePut all the parts where they should go (except hammer spring) but don't put tension on the trigger spring, leave it pointing down. Put the hammer in a cocked position and make sure safety off. Make sure there is a gap between transfer bar and valve as there is a piece of plastic on grip half that goes between them.
Now the tricky bit.
Put the hammer spring on and it will be under high tension, use a small screwdriver to hold it down so it rests against hammer catch. Now try to place the grip half back on still holding hammer spring in place until the grip is in place. Put a screw in the nearest hole and tighten to make sure hammer spring stays in place. Now last job is to poke trigger spring into place through the crack between the two grip halves and screw down. Presto the hard part is done and the rest is easy.
Something's wrong with mine
ReplyDeleteAfter putting it back together it fires but the double action doesn't work (hold)
ReplyDeleteAny suggestions?
I'm wondering if i put the trigger spring in wrong with the longer bent part horizontal in the grove and the shorter part going vertical. Or is it more likely to be the smaller hammer spring come off?