
Removing the breech cap screws.
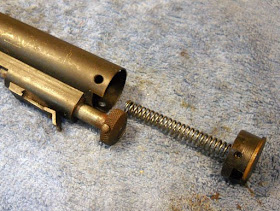
The breech cap and hammer spring come out.
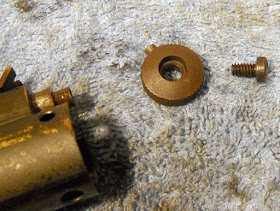
I removed the "bolt button" from the bolt.
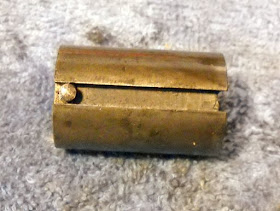
The hammer slid out as well.
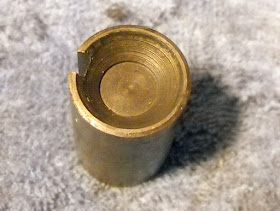
The face of the hammer.
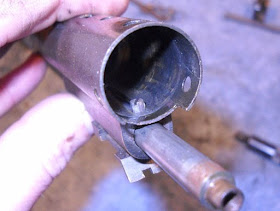
Getting the bolt out requires removing the "bolt guide screw".
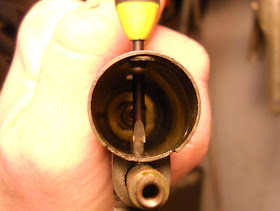
A small screwdriver through the tube does the job.
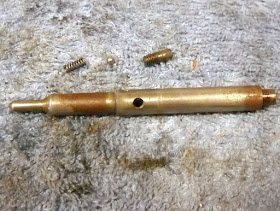
When removing the bolt, as with every other Benjamin or Sheridan, don't space out and allow the spring or (only in the case of the Benjamins) ball bearing to spring up and out into the wild. Notice how shiny the ball is? That's because it's new. Good thing I have a supply of bearing balls on hand.
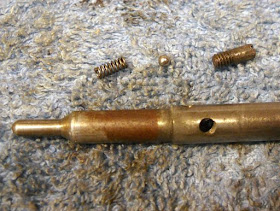
Notice there's no seal on the bolt.
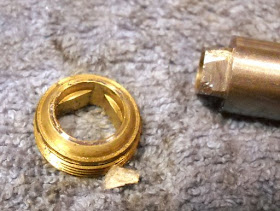
I used my home made valve tool to remove the outlet valve lock screw.
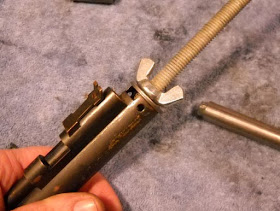
And my home made valve puller to remove the rest of the valve unit.
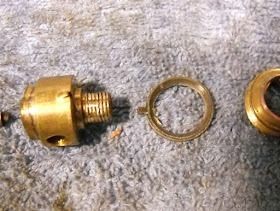
The lead seal is in good shape, notice the alignment tab on both the seal and the outlet valve. There's another lead seal still stuck in the tube that I'll leave in place, it's swaged in there and likely will seal fine. if not then I'll tear it out and install a new one. But I'm nowhere near there yet...

I ground the tip of some music wire to fit in the inlet valve hole.

And carefully inserted it into the inlet valve hole.
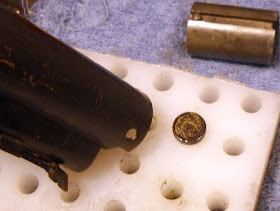
Which pushed out the inlet valve. I have yet to have one just come out easily...
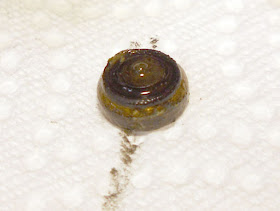
Typical seal extrusion...I'll be making a teflon replacement.
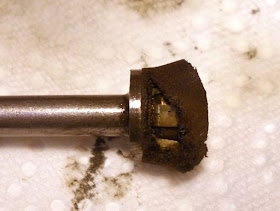
Back to the pump plunger. It looked to be in good shape but it turned out to be torn...
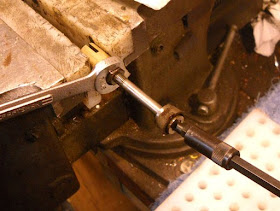
I managed to put enough torque on it to remove the pump rod screw.
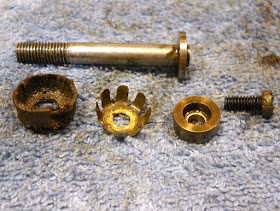
Thus ends the disassembly. According to the drawing in Fletcher's book there should be a washer between the pump expander and the leather cup. But who knows whether they always used those.
Now it needs a new inlet seal, a new pump cup, a lead seal (although I could likely reuse that one), reseal the exhaust valve (I forgot to take pics but it was hard and grooved...) then clean and reassemble. I'm almost done with all of that although fabricating the pump cup is giving me fits. But that's a story for another time.
what size ball bearing is that and where does it go? under the spring im asuming?
ReplyDeleteDid you ever find out a size on that bearing? I've located a spring and bearing you can purchase but it doesn't say its for a 132 but it says for others and I hope the 132 falls under others. It looks like the bolt retention spring and bearing is the same size as the safety bearing and spring but I could be mistaken. I have a spring to compare but unfortunately not a bearing. Unless luck is on my side and I locate it in my garage I'll just end up getting same size as other and hoping it's correct. Baker Airguns has the bolt retention spring and bearing for $6.
DeleteOn the safety it goes in first I believe but on the bolt I'd like to know? Possibly spring first with that part but have not figured out for sure yet.
DeleteMy 132 has a leak where the pump tube enters the lower receiver which houses the valve assembly. Can this be resoldered or would resealing the the valve assembly stop the leakage. I have been unable to find information on barrel removal or valve resoldering. I can email pictures of leakage if wanted. Or you can send info to wwgaylord@gmail.com.
Deletewhat size is that ball bearing?
ReplyDeleteWhat size thread for the valve?
ReplyDeleteThe stem thread?
ReplyDelete9/32"-32 tpi
The larger thread? Didn't bother measuring it.
Has anyone ever see a early benji 132 with checkersd wooden grips?
ReplyDeleteGreat write-up. I got parts to rebuild and followed your steps but when I finished the pellet did not come out. Any ideas what I did wrong? Thanks
ReplyDeletePossibly might be because it was an ok write up but not a great one. I feel if it was great you would have had a pellet come out. I'm having trouble with lack of details and answering of questions. Both of those would help me a lot. I'll just keep hunting for those answers.
DeleteHard to say, sometimes you need to start over again and make sure that it's pumping air, storing the air and then transferring the air to the pellet.
ReplyDeleteNick
Thanks for the instructions to repair the 132 model which is very rare in Germany
ReplyDeletetHANK YOU THIS BLOG WILL LIVE AS LONG AS THE 132 DOES
ReplyDeleteWould like to see a video break down of a 112
ReplyDeleteI found this blog and started taking my 132 apart, Until I got to the part where i needed the special tools. Can anyone tell me where I can buy the tools to finish the job in 2020? I tried the links, but they're either gone or old. Also would like to buy a rebuild kit if one is available?
ReplyDeleteHi, I'm in the same boat as you. I am here debating if I need to tare down this 132 I came upon.i currently don't own any 22 call pellets to test it out, but when I give it a few pumps and try to dry fire it, there isn't any 'puff' of air like I'd expect. I'm guessing that means the seals are bad. Feel free to reach out to me, and maybe together we can rebuild these cool old air pistols.
Delete
ReplyDeletein Feb 2019 I found and ordered these parts for change in eBay:
vintage benjamin air Pistol Model 130/137/132, Part Flat Top Piston
Stay healthy and regards
from Germany
I found some stuff on ebay as well. I was able to get the pump rod and seal kit with tool for Baker Airguns. Also JC airguns i believe was the name can help with some stuff as well. Other than that locating parts can be a bit difficult. You may get lucky and find a parts gun somewhere you can purchase.
DeleteI did not see what you wound up doing for the broken pump handle spring. Did you fix it? Are replacements available?
ReplyDeleteI must have forgotten about it! I'll see, I have a vague memory of fitting something in.
ReplyDeleteNick
Hi great Blog, I am rebuilding my 132 from 1980. This gun has been beat up, but internals seems fine grip Frame was cracked but I repaired that epoxy steel. I just removed the valve to find that there is no key on it for alignment, but has a recessed perimeter like a thread spool where the port is. I think alignment is not necessary as the port is exposed to the barrel in any orientation. Are you familiar with this modification? Should I be aware of any problems with this design or replace the valve body? Seems like it might have been an upgrade to make it easier to remove and service.
ReplyDeleteThank you,
Dale L
My valve has a hole on both sides and no alignment tab. I would push it in all together and found when I went to tighten the nut the valve would turn too so I had to take a few shots at it and basically try to offset it enough to make up for how mush it would spin until I finally got the holes to line up. I was able to put tiny marks with a sharpie on the part that was still visible but the marks don't last long so you may have to remark it a time or 2. It was a bit of a pain but finally got it in there. Now on to the next part. I just wish I had more details as far as orientation of all parts, springs, bearings. Have the schematic but that only helps soo much. I wish this write up was far more detailed or better yet a video instead of a handful of pictures but I guess better than nothing. Hope you've accomplished your project since posting your comment. I have a 66 132 and I've never got to shoot it since my grandparents purchased it. My grandma passed away in 2020 so I was lucky enough to take possession of it and have finally found the time to get the parts and get it back in working order. Looking forward to that first shot and many more.
DeleteHi, Great Blog!
ReplyDeleteI am rebuilding a 1980 model 132, and when I removed the valve body, I found it had no alignment key, but was cut like a spool of thresd with the gas port in the center. Since the port is recessed, it doesn't seem like it needs any alignment because the gasport is exposed to the barrel in any orientation. Are you familiar with this modification? Are there any problems associated with this design? seems like an upgrade to allow easier repair.
I look forward to hearing from you,
Thank you
Dale L
I did a little more research and read some of the comments to this blog and figured out the two port valve was a later edition to the gun. I feel like such a NEWBEE.
ReplyDeleteAt least I learned how to post to the blog.
Thank you,
Dale
Somewhat decent write up. Could have used a little more detail or pictures along the way. Answering the questions to what size ball bearing would be extremely helpful. Also consider moving some details around like the part about the ball bearing and spring . If you mentioned that farther up to give warning instead of waiting till the point that you would have already lost the spring, bearing or both would have been a good idea. Most would like to know that before not after but whatever.
ReplyDelete