A small sanding drum from a Dremel tool grinds a notch for the safety.

Test fit looks good.

Bolted the grips to the frame and sanded the bottoms flat as one piece.

Then set the grip frame on top of the same walnut board the grips came from... Traced around the base of the right-side grip and sketched out a palm shelf. Uh, there's a knot hole there.

Intentionally cut the palm shelf slightly oversize to allow for shaping.

A piece of scrap walnut was planed down to 1/4" thickness...

...to make a spacer for the gap at the bottom of the grip frame.

Traced.

Cut just oversize.


Sanded to fit against the bottom of the frame. Only the front, bottom and back edges will be visible upon completion. Those sides will get sanded flush a bit later.

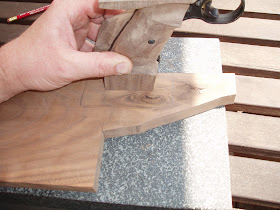
Had to do some minor fitting of the palm shelf so it would slide up and down the grip. The clearance against the bottom of the grip frame was giving me some headaches.

I thought the knot hole added some nice grain swirls and added visual appeal (that's why I used that section of the board).

More of the endless test fitting. Still need to attach the palm shelf to the right-side grip panel.

Drilled two holes in the shelf. A single, center bolt would work, but I've found that two-bolt shelves are more secure and don't cant and shift under hand pressure.

Drilled the second hole then set the depth stop and counterbored with a forstner bit for the allen heads. Use 6-32 fasteners just to be consistent. (Crosman 22XX grips use 6-32's)

Set the palm shelf on the grip, inserted a transfer punch through one bolt hole. Slid the shelf up and down the grip leaving a scribed line. Repeated in the other hole. These mark the centers of the adjustment slots needed.

Mounted the grip in the Taig vertical slide. Essentially, this attachment turns the lathe into a horizontal mill. A 1/8" center cutting end mill was mounted into the headstock and the grooves were cut like butter.

Reversed the set-up and used a larger end mill to cut shallow relief grooves for the nuts.

Nothing fancy. A couple 6-32 square nuts in the recesses will allow the palm rest to slide up and down for adjustment. Not shown: I ended up re-cutting the grooves and recesses to allow for a bit more additional upward adjustment.

A bolt-on test fit. Progress!
Still more to come.
No comments:
Post a Comment