
Always a good idea to take multiple pictures of the trigger group...the spring does double duty as safety detent and sear spring.
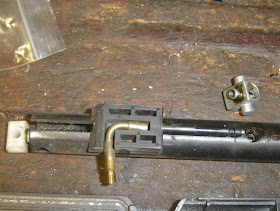
The aluminum transfer port unit was removed. The bolt assembly is plastic. There are 6 plastic parts on the rifle: bolt, front sight, bb loading port cover, stock fore and aft, and hammer plug. Compare that to the modern 760 which is mostly plastic.
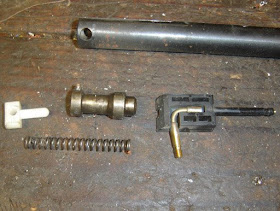
The hammer and bolt parts. Note that this is a knock-open valve system, earlier 760 models used a self cocking valve like that on the 140/1400/130 guns.

The slot in the bolt that cocks the hammer.

Dirty valve assembly. The one fault I noticed before opening up the 760 was that the inlet valve wasn't closing.
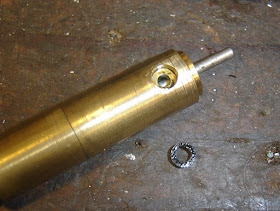
The transfer port seal.
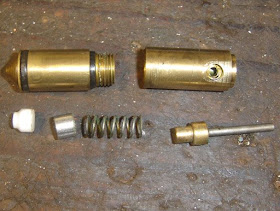
The valve. Notice the aluminum spacer between the spring and inlet valve. Later models just have a longer one piece inlet valve. I had spare inlet and exhaust valves and o-rings on hand as replacements.
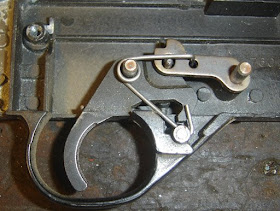
Heck, another picture of the trigger.
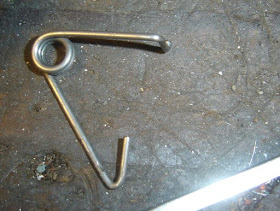
Spring. Notice the little hook that goes in the hole in the sear.

There's another spring under the trigger that hooks around the end.
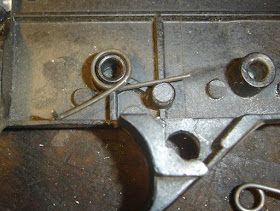
Always good to note.
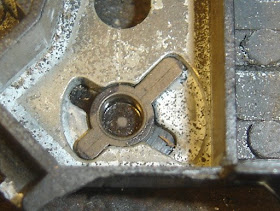
The bb loading port cover can be rotated and removed.
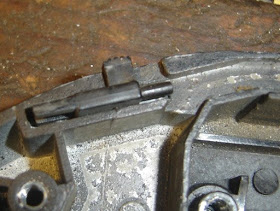
The "magazine" loading switch. I'd love to give the proper names for all these parts but the exploded diagrams don't always have them.

This part is fastened to the other part of the receiver. It prevents you from pulling the trigger when the bolt is open. When reassembling you have to have the bolt open to clear it. Reassembly and resealing had no surprises, just go in reverse.
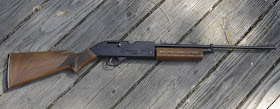
I repainted the receiver, cleaned the plastic stock. Polished the bolt. I removed most of the rust with steel wool and hit it with some Oxpho blue. The bad news is that there's a massive air leak around the transfer port unit/barrel. So I need to take it apart again and fix that. But hey, it looks pretty!
Dear Nick,
ReplyDeleteThanks for your careful documentation of your 760. I referred to it before repairing the 760 I had as a kid. Only fix needed was replacing the o-ring on the exhaust valve; eyeballed a replacement from the o-ring tray at the local car parts store. Works like a charm, total cost 49 cents.
---Scott Butler, scott@sabutler.com
Nick,
ReplyDeleteI am attempting to repair a 760 and am having a heckuva time separating the two halves of the valve assembly. By the pictures it looks to unscrew lefty-loosey righty-tighty, right? Could you relate to me how you went about getting a hold on it, the intlet side I just can't get a solid grip on. Thanks!
Standard Lefty-loosey as you say.
ReplyDeleteYes, it can be a pain...The exhaust hole is a good place tp out a close fitting rod, this can be used as a wrench. But holding the other round body half...
Well if you have a 3 jaw lathe chuck that works well, if it's really tight then a vise-grip chain wrench will work. Or wrap some beer can aluminum around it (for protection) and clamp some vise grips on it or clamp it in a steel jawed vise.
Nick
Fantastic job! I am in the reassembly stage of refinishing my childhood 760. Your photos and descriptions helped me figure out which parts were missing and how I might fabricate them, as well as helped with the rebuild. Thank you!
ReplyDeleteHello, I'm a 15 year old, and as a Father's Day gift, I'm trying to fix my dads old childhood Airgun, I've used a whole can of 4-D40 and starting fluid, the screw that holds the butt-stock to the trigger assembly chamber, in an effort to not strip the screw, does anyone have any ideas to get this screw loose ?
ReplyDeleteLoads of WD-40 or Aerokroil. Let it sit 24 hrs then have at her...
DeleteHello, I'm a 15 year old, and as a Father's Day gift, I'm trying to fix my dads old childhood Airgun, I've used a whole can of 4-D40 and starting fluid, the screw that holds the butt-stock to the trigger assembly chamber, in an effort to not strip the screw, does anyone have any ideas to get this screw loose ?
ReplyDeleteDoes anyone know where I can get the hammer for a 66 power master ?
ReplyDeleteThis was the missing piece for me to properly put the trigger springs back in to the correct position. Greatly appreciated. My 1979 760 is back in action!
ReplyDeleteHow do I get the valve out of the tube in order to replace the rings ? Mine seems to be stuck. Thanks!
ReplyDelete