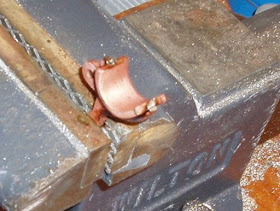
I fed just a bit of solder at both ends hoping it didn't overfill too badly. Gave it some time to cool.
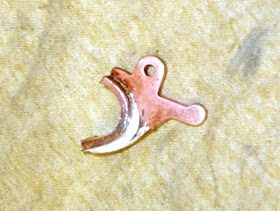
Checked both sides and it looks like I got a full solder line.
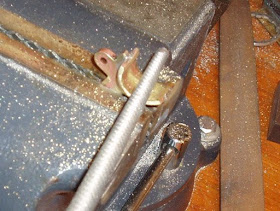
I started removing the oxidation with a round file then realized this would take far too long.
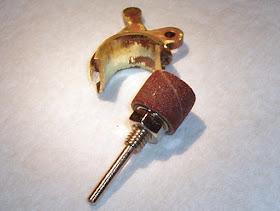
Drill presses aren't just for drilling holes anymore. Here's a cheap small sanding drum. I just grabbed one from the box that was small enough to reach inside the curve.
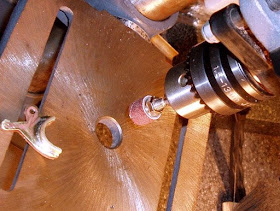
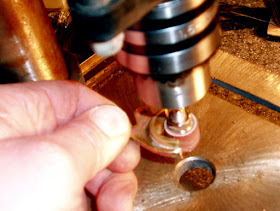
Sand until it fits your finger and take off all the sharp corners. Made it smooth. Took out all the marks from the ill-fated round metal file from a few pictures above.
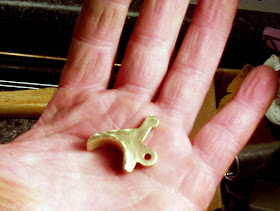
Here's how it came out after the sanding drum. These drums are really nice. Run at very low speeds and you can contour the part by hand. Technically, it's completely useable right now, but I'll take it to the buffing wheel and make it look like I paid crazy money for it. I don't think it's correct to call it a trigger shoe now. I think it's just a wide trigger.
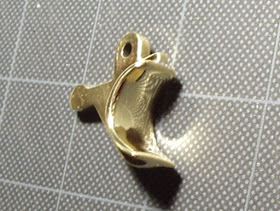
I handed it to Kathy and I don't think she believed I made it. It's really bling.
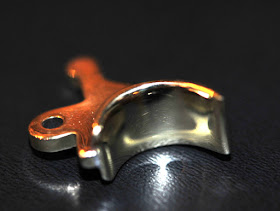
Derrick's verbal amble: Regular readers can see that I often have a miserable time shooting the pics. It takes a lot of discipline to stop and pick up the camera. And I don't have a suitable camera or the steadiness of hand to take good close ups. I've (more than once) shot 100 images and had exactly zero come out the way I wanted. It's not so fun to do the project a second time because of the pics. I went to a heavy hitter for the next picture. My coworker Douglas Charnock is a wizard with a camera. He took this pic with his macro lens. Took him maybe 60 seconds from the time I asked him if he could do it to the final shot. Camera is always at the ready. He took ONE picture, looks up and says, "got it". He ended up taking 2 other shots to appease me, but his first shot was the shot. Thanks Doug! Yeah. This thing is smooooooth.
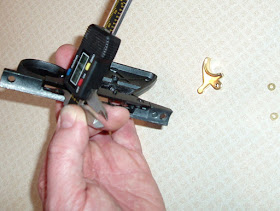
I was about to reinstall the trigger when I remembered that Pringles potato chip-looking little pressure washer used to take up the trigger's side play in the frame. Better late than never, right? I scrounged up a couple small brass washers and did a quick check on the frame's width where the trigger sits. It was in the ballpark of 0.164". The trigger is 0.125" at the pivot pin hole.
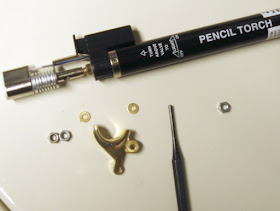
Seems I did want that micro torch after all. It was all of $8. Cheap. Could have done the whole thing with it! I cleaned, fluxed and soldered the brass washers to each side. Used an old pin punch through the holes to line it all up. The hex nuts in the pic were just used against the brass washers for pressure. (The solder won't stick to the stainless steel nuts.) The micro torch was surprisingly easy to give pinpoint heat. I was able to go back and add solder to a couple impossibly small voids. No way to have done that with a full size torch. The whole job would've come apart from the heat.
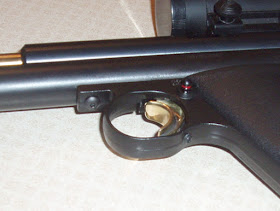
I had to grind a bit off the washers to get the width right. Reamed the hole to 0.125" . Buffed again on the polishing wheel and installed with a new pivot pin. Noticed that my trigger pin was wearing, so I chopped off a 0.394" length of drill rod that was 1/8" in diameter.
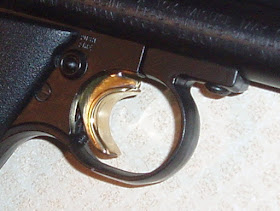
Done. The trigger's face is now approximately 1/2" wide and smooth as can be. Next time, I would angle the face of the trigger toward the trigger finger by about 10 degrees. There's now a target gun inspired (go figure) trigger design floating around in my head for the 22XX series. I'm going to look in the scrap box and see what happens.
Nick/Derrick,
ReplyDeleteVery nice metal fabrication and finishing on the trigger!
Would either/both of you entertain the idea of a project pistol? I have a Hy-Score Sportster 803 that needs work and I believe would make an entertaining blog for your readers, especially given the increasing popularity of Hy-Scores. If you're interested, please email me at mjvanwink2@aol.com and I'll fill you in on my idea.
Thanks,
Mike
Hi Mike,
ReplyDeleteMy plate is way too full right now to take on more airguns!