Still going...
The check valve was up next. This'll allow CO2 to flow from the paintball tank and into the Crosman 160's gas tube, then close as the tank is removed--thus sealing the gun.
Faced off a scrap of 7/16" diameter brass and turned down an end to 0.122". This will become the check for the valve.
The nose will fit in the through-hole drilled in the plug and keep the check aligned.
Parted it off.
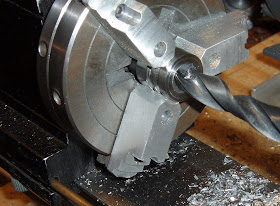
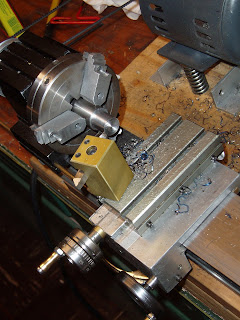
Chucked the gas tube plug and spotted for a larger hole.
Drilled about .300" deep with a 7/16" bit.
Followed by a small boring bar to bring the hole just larger than the base diameter of the brass check. The check needs to have free movement in the bore of the hole.
Test fitting proved that the check was sticking slightly in the through-hole. Another center drill chamfered the edge of the through-hole and all was well in the world.
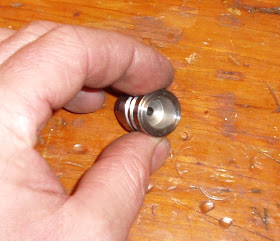
The boring bar left a nice, smooth bottomed counterbore. Hopefully, it's smooth enough as it is a sealing surface for the check.
Another view.
Gotta pin the check valve into the plug. Through drilled with my tiny bit friend #52.
Like so.
Found a DT bicycle spoke in the bike stuff. They're forged from 18-8 stainless steel.
It's butted--so that means that it's thicker at each end. I cut a piece off and squared the ends on the grinder. Not shown: Blued the plug.
Installed a #006 o-ring on the check.
Dropped the o-ringed check into the counterbore...
and installed the spokey retaining pin.
Made the piece of spoke just less than the diameter of the plug so the ends are recessed. As usual, I again pressure tested the gun. (One of my napkin cartoon drawing requirements was that the base of the bulk-fill plug be sized to allow use of conventional 12g cartridges in the gun as a back-up power source. Though, only the rearmost cartridge will pierce as there's no piercing device on the bulk-fill cap.) Anyway, the o-ring sealed just fine initially, but tapping the check valve didn't vent any CO2 gas. This meant that there was no way to introduce gas into the gun from the paintball tank. I got some shooting in until the gun was empty, then disassembled the check valve and tried a different o-ring. Same problem. ??? Odd, since I've got several other bulk-fill caps that use o-rings in the check valve with perfect function. So, the o-ring proved to be a mistake and a lot of CO2 cartridges died unnecessarily. I did, however, get to shoot many, many pellets that afternoon while exhausting all those 12g cartridges. So, in that light, it was kind of a good day.
I remembered that I had a small sheet of rubber. It was supposed to be for making stem seals for various Crosman rifles. A 3/8" hole punch and a block of scrap wood should do the trick.
Just like Whack-a-Mole but with even worse prizes.
A 1/8" hole punch makes the hole for the valve stem. I am so low (no) tech.
Took the gun apart one more time and installed the flat seal. Three hours later, it's still holding, venting on demand and re-sealing properly. Fingers crossed, I'll test again tomorrow.
Then on to the next and final part.
Thursday, July 22, 2010
Tuesday, July 20, 2010
Making a Bulk-Fill Cap for a Crosman 160 Part--2
The slow saga continues.
Didn't think that there was enough material in the plug made in part 1 for 1/8" NPT female thread to fit my bulk-fill adapter. Rather than start again from scratch (and buy another specialty tap to match the gas tube threading) I thought that a larger diameter head added to the front of the plug seemed to be the easiest way to salvage the project. So, another piece of 0.750" dia. drill rod is cut.
Reduced just less than half the OAL to 0.379" dia.
...and threaded to 3/8"-24.
The new head for the plug. Why 3/8"-24? Well, it looked like the largest thread size I could comfortably cut into the plug and I had both the required tap and thread cutting die--so no additional capital outlay was necessary.
Need to seal the two pieces together so the CO2 won't leak. A small, home ground parting tool made a relief cut at the base of the male threads for a small o-ring. Wrapping several turns of teflon tape around the threads would have probably worked, too, but I'm a glutton for punishment.
The front of the plug was initially left long to provide a holding surface to cut the o-ring grooves. Shortened it up a bit with the parting tool.
Again, lots of cutting fluid and slow turning speeds saves the blade.
Through drilled the plug with a 1/8" bit.
Then, drilled partially through the front third of the plug with a 21/64" bit and counter bored. This left a stepped hole of two sizes. No pictures for some reason? Not shown: Tapped the hole 3/8"-24 followed with a bottoming tap. A bottoming tap typically leaves about three threads only partially formed at the bottom of the hole. So, I ground off the taper on a spare tap and put full-size threads right to the bottom.
Used a tiny boring bar to cut a seat for the o-ring into the front of the plug to seal the threads.
The small o-ring to seal the halves together is a P7. The two larger o-rings that seal the gas tube are 112's.
O-rings on...
and pieces screwed together with the locking ring in the middle.
Installed, again, with one live CO2 cartridge and one dummy to check pressure retention. No leaks to report three days later.
Just need to tap for the 1/8" NPT fitting and make a check valve that seals the gun as the paintball tank is removed after filling.
More to come...