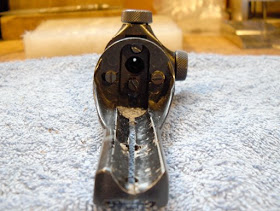
I picked up a (somewhat damaged) Walther Aperture sight on Ebay for a song...
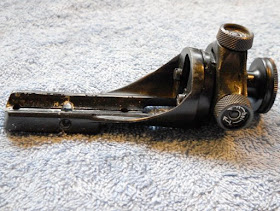
A nice match sight.
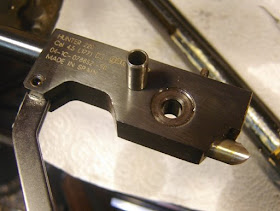
The dovetail mount is a bit scarred up.
You can see a crack at the screw hole.
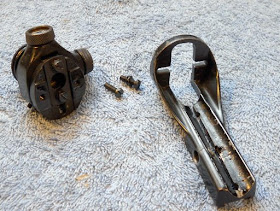
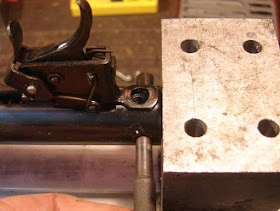
The end can be spread apart to show the crack. I'll probably just fabricate that part when I get around to fixing it. I wonder how much Walther wants for one or if it's available?
Removing the body from the mount.
You can see that it has provision for gross lateral adjustment.
Removing two more screws...
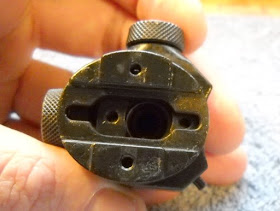
You can see the interior now.
An intermediate block that allows gross elevation adjustment.
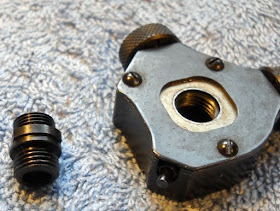
I removed the aperture disk.
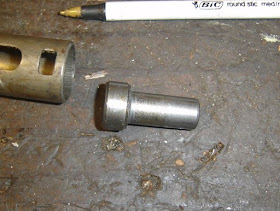
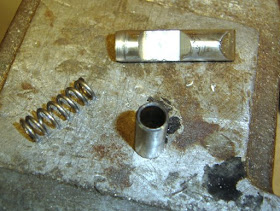
And the threaded tube. Apparently these were available in different lengths to tweak eye relief.
Removed the three screws on the back plate.
The mechanism.
Up and to the right.
Down and to the left. Notice the "plunger" sticks out more the further to the left and down you go.
Pretty simple parts.
There's a spring steel clip that retains the knurled knob.
It slides out.
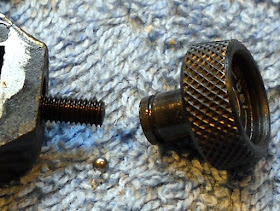
Unscrew the knob and a ball drops out.
There's a spring as well.
All the parts of the screw assembly.
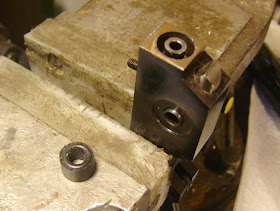
Once both knobs are removed there's just a steel shim and it's all apart.
Have I ever mentioned I find sights fascinating?
Saturday, July 18, 2009
Wednesday, July 15, 2009
Crosman Mark 1 / RB Grip refinish
My respite from the Crosman 147BP as the epoxy paint dries.
I've had a Crosman Mark 1 pistol for many years. At an airgun show in Findlay, Ohio I ran into the "RB", Ralph Brown, of RB Grips. You know Ralph--he makes the wood grips for Crosman's Custom Shop guns. When I saw his selection of grips for vintage Crosmans, I thought of the Mark 1 with it's plastic. A set of "walnut and racing stripe" (as I call them) grips were purchased for not nearly enough money.
**Sidebar: Years ago, I considered making a set of Mark 1 grips. The set-ups and fitting to make a single pair, the other projects in my que, limited free time...man, it's a lot easier to buy the RB's and get a couple days of your life back.
Besides, with the stripe, they're quite different than what I would have typically chosen or made for myself. I know. I really went nuts.
I don't know if the orange colored center wood is osage or perhaps mulberry, but it's an interesting look for a vintage CO2 pistol.
I believe these are the "target" version that RB sells. I wanted the extra material in the grip knowing that I could do some fitting.
The only thing I didn't care for was the high gloss finish. It's a bit too slippery for my taste. It also shows the nicks and dings from handling sooner than an oil finish. I see from RB's website that other finishes--as well as raw--are available.
Slathered the grips with Strypeez and brass brushed the gloss off. Had bare wood in a few minutes.
Forgot how thick the grip frame is on CO2 guns that house the cartridge in the grip. There's not much extra grip thickness to work with.
With various sizes of sanding drums at the ready, I first focused on the top of the back strap.
Next, I turned my attention to the right grip panel and made a shallow groove for my forefinger.
Finally removed some material at the heel.
Ended up about here. Repeatedly holding the grip and pointing at an imaginary target on the wall will tell you where to remove material.
Don't want to round the base of the grip where it fits flush against the grip frame? Leave the grip on a flat surface (like the top of the workbench) as you sand.
I sanded to 220 grit. I've said it before several times--garnet paper is your best friend for sanding wood. Forget the aluminum oxide paper--that's for sanding metal. It's a pain to try to remove aluminum oxide that's embedded in the wood.
Ready for a finish.
Why not? I've been using a lot of Birchwood Casey Tru-Oil lately. And this pint is darn near full. Shoot, the can even says it's the traditional finish for gun stocks! I can't go wrong.
One down in about 20 seconds.
The boiled linseed oil really brought out the grain.
Hand to gun fit is much better--which always helps on the firing line--and I like the softer look on the wood.
Back to the 147 BP next time around.
I've had a Crosman Mark 1 pistol for many years. At an airgun show in Findlay, Ohio I ran into the "RB", Ralph Brown, of RB Grips. You know Ralph--he makes the wood grips for Crosman's Custom Shop guns. When I saw his selection of grips for vintage Crosmans, I thought of the Mark 1 with it's plastic. A set of "walnut and racing stripe" (as I call them) grips were purchased for not nearly enough money.
**Sidebar: Years ago, I considered making a set of Mark 1 grips. The set-ups and fitting to make a single pair, the other projects in my que, limited free time...man, it's a lot easier to buy the RB's and get a couple days of your life back.
Besides, with the stripe, they're quite different than what I would have typically chosen or made for myself. I know. I really went nuts.
I don't know if the orange colored center wood is osage or perhaps mulberry, but it's an interesting look for a vintage CO2 pistol.
I believe these are the "target" version that RB sells. I wanted the extra material in the grip knowing that I could do some fitting.
The only thing I didn't care for was the high gloss finish. It's a bit too slippery for my taste. It also shows the nicks and dings from handling sooner than an oil finish. I see from RB's website that other finishes--as well as raw--are available.
Slathered the grips with Strypeez and brass brushed the gloss off. Had bare wood in a few minutes.
Forgot how thick the grip frame is on CO2 guns that house the cartridge in the grip. There's not much extra grip thickness to work with.
With various sizes of sanding drums at the ready, I first focused on the top of the back strap.
Next, I turned my attention to the right grip panel and made a shallow groove for my forefinger.
Finally removed some material at the heel.
Ended up about here. Repeatedly holding the grip and pointing at an imaginary target on the wall will tell you where to remove material.
Don't want to round the base of the grip where it fits flush against the grip frame? Leave the grip on a flat surface (like the top of the workbench) as you sand.
I sanded to 220 grit. I've said it before several times--garnet paper is your best friend for sanding wood. Forget the aluminum oxide paper--that's for sanding metal. It's a pain to try to remove aluminum oxide that's embedded in the wood.
Ready for a finish.
Why not? I've been using a lot of Birchwood Casey Tru-Oil lately. And this pint is darn near full. Shoot, the can even says it's the traditional finish for gun stocks! I can't go wrong.
One down in about 20 seconds.
The boiled linseed oil really brought out the grain.
Hand to gun fit is much better--which always helps on the firing line--and I like the softer look on the wood.
Back to the 147 BP next time around.
Tuesday, July 14, 2009
Disassembling a Gamo Hunter 220, Part 2
On I go...
The plastic shoe, pivot bolt, e-clip and spring.
The washers are cheap plastic...
I mounted the action in the spring compressor, took up the preload and removed the stud.
The allows the trigger group to be removed.
And the pin retaining the end plug and spring comes out easily.
It's a fairly beefy pin.
The end plug comes out under spring pressure.
Plastic again and scarred up. I wonder if someone "tuned" the rifle or if it's just poor quality control.
The spring was a bit canted.
The piston.
The "top hat".
The seal was a bit burned and again, coated in sticky lube...
Not in terrible shape but I replaced it with a new one.
The breech seal is not an o-ring but a huge rubber tube.
There's a bushing in the pivot hole that retains the detent.
Detent parts.
I cleaned everything. Then I tried a couple of other springs I had laying around but none gave similar power as the original spring. Assembly was the same as disassembly but in reverse...JM lubes were used to quiet the twang.
I really lack any enthusiasm for this rifle so I decided not to monkey with it further. It works and I'll trade or sell it at some point.