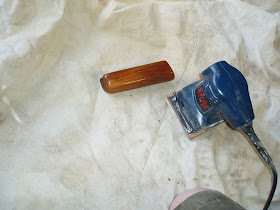
Thought I'd try fitting the rubber butt pad with a hand sander. Spoiler alert: It doesn't work.
The rubber flexes away from the sander too much.
Here's a few minutes trying to fit the toe. It's curved...
Not good. Most people I know who fit rubber recoil pads use a disc sander. I was trying to avoid working inside the house--mainly because the rubber dust gets everywhere.
Out of sheer curiosity, I mounted a sanding drum into the 3-jaw chuck on the Taig lathe, and profiled the butt pad by eye in about 60 seconds. Likely not the way to do it if you're on that fourth cup of espresso.
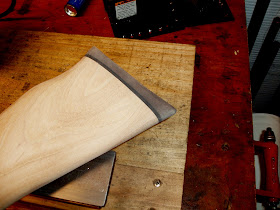
Looked pretty good. I sanded the stock down to 220 grit.
The pad is pretty dusty from the wood sanding. It'll get cleaned off later.
After the sanding, a rag dampened with some distilled water is run across the wood. As the water evaporates, it lifts wood "whiskers" from the sanding. Allow the stock to completely dry then sand again with 220 grit to remove the fuzzies.
A coat of a redwood oil based stain. Given my past history staining vintage Crosman stocks, I opted for a stain with a lot of pigment. My hope was that the redwood stain would give enough color to the wood to make it look like cherry. Why not just use cherry stain? I tried that. Cherry colored stain makes these stocks turn light pink. And I really wouldn't be using the 147 much if it looked like a pink underbelly...
The forend looks like a brick. Functional, but a bit too blocky.
Put the sanding drum back to work reshaping the front end.
Softened up the nose.
I'm probably going to regret working these as two separate pieces.
Redwood stained. The through holes I drilled (in Part 1) to get the roll pins out really stand out in this pic.
And then I decided to do more work. The metal on the 147 BP was in so-so shape cosmetically. I completely disassembled the gun and started by stripping the old paint off the trigger housing assembly with a wire wheel.
The paint on many vintage Crosman trigger guards take a beating every time the guns are disassembled as they're pulled through the wood stocks.
Pump arm, barrel assembly, pump tube, trigger guard are all looking tired. The bluing had all gone plum. Pump guns get a lot of handling by nature--especially by the time they turn 43 years old.
Epoxy spray paint from Rust-Oleum. I've used this stuff before on the compression tube of a Baikal IZH-46M. The 46M tube was thinly blued when new and didn't age well. Hit it with two coats of this and it looks factory finished and incredibly tough.
Downside? The drying time. I could bake it and get it over with sooner, but my wife would probably not take kindly to gun parts in the oven. I'll give it a couple days at least. If it holds up for the next ten years, what's 48 or so hours anyway?
Some .177 cal felt cleaning pellets.
Only need two...
One to keep paint out of the muzzle...
And another to plug the breech.
Don't want paint inside the compression tube. A piece of 1/2" PVC pipe fits the ID of the tube perfectly.
Painted everything and hung to dry. Also ended up painting the end plugs and front sight.
One coat of Birchwood Casey Sealer and Filler and I rubbed the stock down with 0000 steel wool.
Most of the grain is filled now. Hopefully several coats of Tru-Oil will finish the job.
A pretty good slathering. Now, some drying time and several more coats.
Still more to come...
Saturday, July 11, 2009
Thursday, July 9, 2009
Crosman 147 BP Stock Refinish, Part 1
Another gun from the "doesn't get used pile" is a $35 gun shoppe acquired Crosman 147 BP multi-stroke pneumatic. Due to it's trigger arrangement, it's what Crosman collectors call a second variant and therefore from around 1965 or 1966. The 147 BP is the .177 version of the .22 caliber Crosman 140. The BP stands for BB/Pellet. I didn't even realize that it was the BP model until I cleaned the bolt and found the magnetic tip designed to hold the steel BB. Anyway, I brought it home, and confirmed it leaked like a sieve.
Rambling airgunner sidebar: This gun is probably responsible for any and all inner hatred I harbor for multi-pump pneumatics. I believe I disassembled the rifle somewhere around 12 to 14 times. You've seen Army recruits assemble their guns blindfolded? Yeah, I can do that with the 147. At first, the question was, "where isn't it leaking from?" Spring piston guns? I cut my teeth on. CO2 guns? I can figure out. Single stroke pneumatics? OK, can do. A multi-stroke pneumatics from about 1966 with a bad pump cup, bad check valve, and bad exhaust valve? Are you kidding me? This was a gun just full of learning curves.
Eventually though, the gun was repaired and set aside--being deemed too ugly to shoot.
Lots of raised grain and a few dings and dents in the wood. I recently refinished a Crosman 180, and I wanted a similar cosmetic transformation. Of course, the gun is actually in fine shape considering it's age. The fact that it still shoots--and shoots well-- is truly a testimony to the engineering and materials used 43 years ago. Hopefully by now, readers know I'm pretty tongue-in-cheek when I'm talking about these devilishly designed multi-stroke guns...
Essentially, I think my vintage Crosman problem is one of aesthetics. I suppose I just can't warm up to old varnish finished air rifles. If I'm going to keep it, I guess it's gonna have to get gussied up. At the risk of being labeled as a one-trick pony and being permanently type-cast, I'm afraid that this refinish will be sort of similar to the Crosman 180 refinish previously mentioned. Sorry 'bout that. The guns share a lot of similarities not only in finish, but also in several components like sights and trigger mechanisms--which is too be expected as the guns overlapped during time of manufacture. It's hard to not make the comparison as I've been working on both guns almost simultaneously. The 147 got a few modifications (rear sight and recessed stock nut) that won't get blogged as they're already covered in depth during the 180 write up.
Sort of jumping ahead, I pulled the action and hit the stock on the sander.
Half an hour later, I was about here.
While I'd decided on a simpler refinish than the 180 got, I still wanted some pride of ownership (multi-stroke not withstanding--grrr).
Mixed up some fast setting 2-part epoxy, adding a liberal amount of the sawdust from the above sanding/stripping step...
and filled the dents and dings. Overfill slightly.
A chicken pox stock.
The next day, I lightly sanded all the filled areas.
The pump arm was a slightly bigger hurdle. The lever arm is held by two roll pins--and the holes don't go completely through. How do you get them out??? I found a very small drill bit that passed through the center of the roll pin. Using the drill press, I drilled through the wood on the far side.
You can just barely see the holes--they're that small.
The small holes become a guide.
Using a larger diameter bit that matched the OD of the roll pin, I drilled the guide holes out till I hit the roll pins.
Now, I've got holes on both sides of the pump arm.
Set a drift.
And hammer the pins out.
One more time.
And we're free.
This seems somehow all too familiar...
Wanted something that looked good, but didn't take 2 weeks of free time to finish. I scrounged around and found a couple old Weihrauch butt pads that looked sort of promising.
At some point, I also made a clean cut on the butt of the stock for the rubber pad.
I think this came off a Beeman R1 a few years ago.
Like the 180 stock, I sanded the butt of the 147 BP on a granite plate until it was truly flat.
Then I sanded the rubber pad dead flat as well.
A transfer punch located the upper screw hole.
This was followed by drilling and snugging down just the single upper bolt.
Once the upper bolt was snug, I repeated the transfer punch, removed the pad and drilled the second, lower screw hole. Here, I've reinstalled the pad and begun to tighten the second screw.
It's oversized to allow for fitting. Unfortunately, I didn't think the 2 screws held the pad tight enough to the wood for the sanding. Hand pressure alone was gapping the pad too much for my liking.
Yeah, Gorilla Glue. I love this stuff. Now I'm in limbo as I wait for it to dry.
More to come.