Friday, June 5, 2009

Crosman 180 Stock Refinish Part 4 Finale

Over the last few days, I filled the grain and gave the stock six or seven coats of Birchwood Casey Tru-Oil. It's a slow process. Coat the stock with a thin coat of oil, let it dry. Use quadruple-aught (0000) steel wool and buff the finish. Grab a tack cloth and remove the steel wool and any dust. Start over with the Tru-Oil. I could (should?) do another 5 or more coats for a really professional looking finish. It would probably look 10% better. But, I'm not a professional and I want to get on with my life.
June 5 update: Spent the extra time and got that pro finish after all.

This is after the last coat of Tru-Oil--before the steel wool and tack cloth work.


Glossy, baby.

Running your hand across the surface lets you feel how the Tru-Oil dries a bit unevenly. It's a bit unnerving at first to scuff the surface with the steel wool. Seems like I worked so hard to get it shiny and now I'm undoing all that.

Go easy with the steel wool. Try for a matte finish on the stock. Especially concentrate on any glossy or built up areas. It helps to work outside or under a strong light.

Since I was quitting at this point, I gave the stock a quick buff with a silicone treated rag. This gave the stock a nice warm look.

Screwed the sling stud into the hole previously drilled. Went looking for the action.

A few weeks ago:

This is a look back at the 180 as I received it from James.

Excellent shape given it's age.


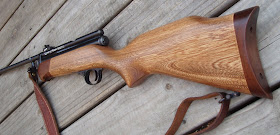
Here's the 180 today:

Repaired valve, resealed, bulk-fill capable, new bolt handle, trigger work, new rear sight...

Josh, this is how I'd add a sling to a vintage Crosman rifle.

Had an old leather strap from Beeman's. Got it a couple decades ago with my Feinwerkbau 124. Looks the part on the old 180.


Nick, thanks again for the Knight rear sight. A huge upgrade in both quality and aesthetics.

The wood transition lines are super clean. I think sanding the pieces on the granite surface plate really panned out. I'm extremely happy with the Gorilla Glue, too. It promises to be waterproof and insanely strong.

Yep. Deck screws for the butt.


I'll probably respray the trigger guard in a semi-gloss black. An epoxy paint would be best. Simply removing and reinstalling the action into the stock a few times really wears the paint off the edges of the guard. The stock will get more polishing from the silicone cloth over the next few weeks.
I wasn't going to go to all this trouble until I realized that I simply wouldn't shoot the gun much otherwise. Given the choice to shoot something plain Jane or gorgeous, which would you choose? There's a Crosman 147BP sitting downstairs that could benefit from similar treatment. It's on the list.

Thursday, June 4, 2009

Crosman 180 Stock Refinish Part 3

Well, I'm back at it.

Need to form up the butt and forend.

Used a hand plane to shape the walnut butt . Worked really well as I was able to carry the stock lines right through.

Getting closer.

Switched to my mini-plane.

Some sanding will take care of the rest of the transition.

I removed the deck screw that was holding the forend to the stock for the glue up and cut the forend back a couple inches. Need to keep the stock short enough to access the bulk-fill valve.

Scored a line for the edge of the gas tube channel inletting.

Tried a couple methods of wood removal but settled on a small carving tool. I should have used a larger one, but I didn't feel like sharpening it.

Dropped the stock into a set of padded vise jaws and finished the channel. Test fit the 180 action to ensure that the tube bottomed in the bed and there was adequate access to the gas valve.

Now on to the front. Since short rifles have traditionally been fitted with schnabel-style forend tips, and since I don't currently have a rifle with a schnabel forend...

A drum sander in the drill press allowed me to play with the shape until I was more or less satisfied. I didn't show the absurd amount of stock sanding that followed. I used a random orbital sander starting at 80 grit and successively moved up to 220.

Sanding is almost done. Decided to slightly countersink the bolt that secures the action. Unnecessary, but it should tidy up the lines a bit. Oh, that's a forstner bit to make flat bottomed holes in wood. Blog reader, Josh, wondered about adding a sling attachment to the 180. Strangely enough, I had a spare Uncle Mike's swivel kit (kit #1051-2) in exactly the right size. I didn't take any pics, but I did drill the buttstock with a hole and a counterbore for the screw stud.

The part I dread: What will the chosen stain color look like?

I don't think I showed this earlier. I used the sanding drum for shaping the inside curve.

First coat. Ended up using a Minwax cherry (#235 ) colored stain. Past experience with vintage Crosman stocks tells me to expect a lot of yellow/gold colors.

As an aside, I tried Minwax "Gunstock #231" but it looked pink and fleshy on this particular piece of wood. Not really what I was going for.

I can live with this look.

A few more coats to darken things up then some grain filling after the stain has dried.
One more installment coming after some drying time.

Tuesday, June 2, 2009

Disassembling an early Crosman Model 760, Part 3

As I said in the previous entry, there was a bit of an air leak around the barrel/transfer port.

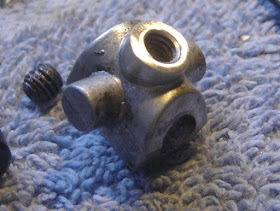
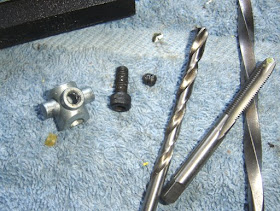
One problem was that the setscrew hole in the transfer port that holds in the barrel was stripped. So I dug out some 10-32 helicoils, the proper drill and Helicoil tap.

A helicoil tap is identical to a regular one, just larger in diameter.

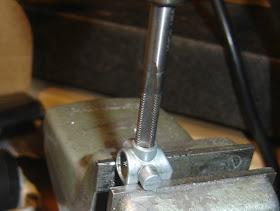
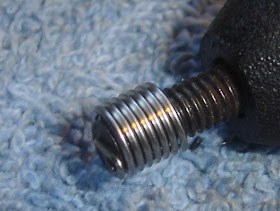
The helicoil, you can see a small bent tang that allows the tool to screw the helicoil into the hole.
Afterward this tang is snapped off with a pin punch.

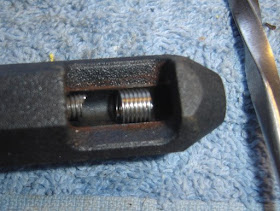
The helicoil is inserted in the tool and the mandrel threaded on, and all threaded into the tool body. This help maintain the proper spacing/tension.

The tool is placed against the hole and the helicoil threaded in.

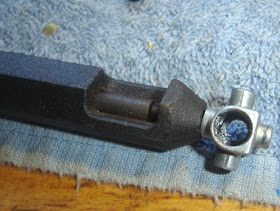
It was a little long...

Ground off flush with the transfer port.

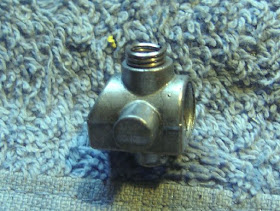
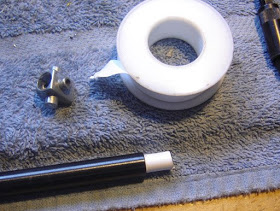
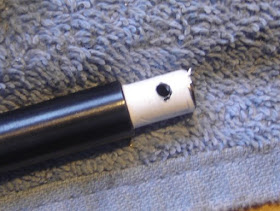
There was also about .01" play between the barrel and the port diameters. So I wrapped the barrel with a few turns of teflon tape.

And poked a hole where the port is.

Assembled snug and tight. There is no more air loss here.

Sunday, May 31, 2009

Benjamin Marauder

Last fall, I entered and won Crosman's Summer House contest. The top prize was an as-yet-unnamed rifle still in development. As the Discovery PCP rifle had recently come to market, there was a hint that this would be a "new and improved" version. The wait was well worth it. A .22 cal Benjamin Marauder serial number #100 along with a Benjamin HP hand pump arrived a couple days ago. It's my first PCP rifle. Kinda ironic that the Crosman Summer House entry I wrote was about restoring my late grandfather's 1954 Crosman 118 rifle. The 118 is a 10-shot, bolt-action repeater with a bulk-filled gas reservoir under the barrel. Ironic, because Crosman sent me a 10-shot, bolt-action repeater with a bulk-filled reservoir under the barrel.
I should probably pause and mention that since Crosman owns Benjamin, I tend to use the two names interchangeably. And, please excuse the lack of comprehensive photos. I only had time for a few pics.

Some quick initial impressions: Filling the gun from almost zero to 2800 psi was a chore--to put it kindly. (The gun ships with just a few psi in the reservoir to hold the seals in place.) It was hotter than Hades and almost 100% humidity the night I got the rifle. I lost count of pump strokes, but there must have been a couple hundred. I took about 3 (Ok, maybe 5) breaks. I really wanted to lie on the basement's cool tile floor and wish for a scuba tank. Somewhere along the way, I rather quickly surmised that I'd made a tactical error: My initial plan to shoot the gun primarily on CO2 and occasionally on compressed air had a serious flaw.
The good news was that the pump force doesn't really increase much after about 1000 psi, it just took a while to get the gun filled. The Benjamin pump is a serious piece of hardware.
Note: You need only fill the gun once from zero. Top offs involve about 45 to 50 pump strokes and are not a problem. I've been topping the gun off every 40 shots. I should probably mention that I'm 39 and in OK shape...

This is 20 shots. The pellets kept going through the center. Just shy of 10 whopping meters. Hey, stop snickering. At least it was off-hand. I did mention the off-hand part, right? Anyway, the gun is absolutely motionless as it fires--like a 1o meter match rifle. Except, it's spitting .22 caliber pellets out over 900 feet per second. Once sighted, a hole just appears at the cross hair intersection. Then, rack the bolt and do it again 9 more times.

The gun is shrouded. It's pretty quiet. I've no basis for PCP noise comparison. The striker spring makes a weird "poiiiing" sound. That's about all you hear. The pellet impact is loud in comparison to the rifle's discharge noise.
Update: OK, I was at the Pyramyd Air moving sale. I DO have basis for comparison. Several unshrouded PCP rifles were fired (no pellets loaded) and they sounded like a .22 short. There is no way I'd shoot an unshrouded PCP without some hearing protection.

Pulled the closest scope (off another gun) that I could find. Happened to be a Leapers 6X "Bug Buster". Needed the offset mount because the compact scope has supremely short tube sections and the Marauder has a loading gate for the 10-shot magazine. Anyway, a "normal" looking scope will fit right on using a set of 2-piece rings. The gun has an integral 11mm dovetail. I think I want a 4-16X Centerpoint scope for the gun. I've got 2 now on other guns and it's a tough scope to beat for the money. A wide, useful power range allowing relatively quick snap shots in the woods as well as enough magnification to reach out on long sitting shots. Then, I think I want to keep it light with something like the 6X Bug Buster. If I was going to carry the rifle in the woods, scope weight would become the deciding factor.

Pressure gauge on the gun seems to agree exactly with the gauge on the hand pump.

Quick-fill Foster fitting.

I dropped the second stage of the trigger pull weight down to a couple ounces. The trigger in this gun makes me think Crosman fired their attorney. The trigger, to me, was the biggest revelation in this rifle. It's really impressive.
Wishes/changes/options would involve some seriously ridiculous nitpicking. This gun would be devastating in a .25 cal. There's enough power to make that a real contender of a caliber here. Of course it would be cool if the new adjustable Challenger stock fits, too. Oh, yeah, there is one thing. The gun should come standard with at least 3 magazines.