So now to do a little thinking...
Here are the Theoben conversion parts that I found in my rifle.
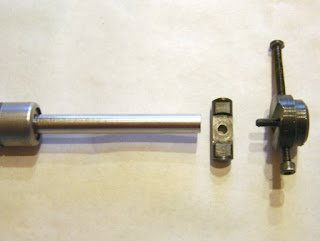
The setscrew is threaded through the end cap, fits through a hole in the cross pin and bears on the end of the gas ram.
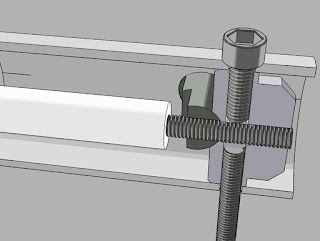
Here's a cutaway view. All the force of the ram is taken by the screw through the scope rail on top and the stock screw on the bottom. This probably explains why my stock screw was stripped at the end. In order to take the stock off, you have to unscrew it. But it's under a small bit of tension, so as you remove it, it's rubbing against the tube with some force. If the setscrew could be loosened before removing the stock, this would eliminate that wear.
I am not crazy about the fact that this conversion bypasses the cross pin.
The stock spring setup.
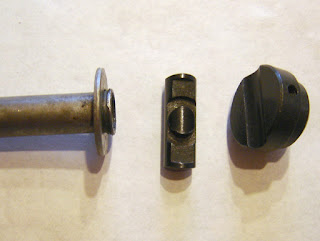
The spring rests on the washer fitted to the spring guide on the left, and the force is transferred to the cross pin by the washer and the spring guide.
With the stock setup there is no force on the scope rail or stock screw at all.
So my main question is:
Was this really how the Theoben conversion was made on the BSA Superstar, or am I missing some parts that would transfer the force to the cross pin?
And a few followup questions:
If the Theoben setup is the way it's supposed to be, is it ideal?
Would I be better off making a washer of some sort that could transfer the force to the cross pin?
Should the setscrew be screwed in to just touch the end of the Theoben ram, or should it be used to provide extra preload?
I'll have to ask around on the forums...
Friday, August 22, 2008
Wednesday, August 20, 2008
My BSA Superstar, Part 2
Continuing to strip the rifle...
The pin at this point was loose and I slid it out of the way. If the coil spring had been fitted I would have had to make a pusher that slipped around the pin and pushed against the spring guide to relieve the tension.
The end of the gas ram. The setscrew in the cap apparently is used to set preload on the ram. I'm not sure I'm happy about that setup as the force of the ram is against the two screws that hold the end cap on, rather than the pin.
The gas ram slid out.
Don't worry, I won't open it. Likewise I couldn't find any place for the pump fitting to screw onto, so it must be a later ram that does not have adjustability? Or the pump port is hidden?
There was a steel washer at the piston end.
I had to hammer with a drift against the "Maxi Grip" rail, to get it to slide backwards and off the action. I don't like this system...
The long wire spring that retains the cocking lever in the slot was removed.
The sear is the last thing blocking the piston.
The pin that it pivots (and slides...) on was pushed out and it was removed.
The sear and pin.
The piston looked pretty good, if gunky.
I don't think I'll need to replace the piston seal.
I pried the rotary breech handle out.
And pushed the rotary breech out using a wood dowel through the barrel.
The rotary breech. I always assumed it was steel, but it's a plated alloy casting.
This might be the source of my power loss. Lots of gunk.
And the seal seems to be on its last legs. Both of the o-rings will be replaced.
Tuesday, August 19, 2008
My BSA Superstar, Part 1
Sometime, at least a decade ago, I traded a Taig lathe for a BSA Superstar in .177 caliber with one of my customers.
The rifle is beautiful, and the first quality air rifle I acquired. I really wish I could remember who I got it from, and the emails between us were lost. It is fitted with a Theoben gas ram spring, although he also sent the original coil spring with the rifle.
Over the years it seems like it's lost power. I put some rounds through the chronograph and it's shooting in the 760 fps range with Crosman Premier Light pellets, which seems slow. It definitely doesn't sound as authoritative as it used to. The guy I bought the rifle from also supplied a Theoben pump, which he never himself used, but assumed that it could be used to increase the power of the ram.
So I figured I'd take the rifle apart, clean it, replace seals and see if I could do anything with the gas ram.
I was somewhat hampered as I found very little information on stripping the BSA, and only one online exploded drawing (From the ever useful Chambers site). But how hard could it be?
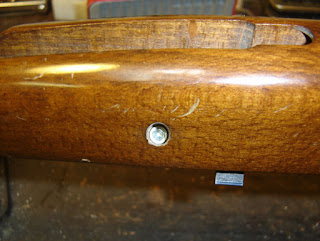
The trigger guard and screw need to be removed. The screw is taken out then the guard sort of slides and rotates out of the stock.
The stripped end of the screw troubles me.
The two forward stock screws then are removed.
The plastic end cap was cracked in two places. I have no idea why.
This should be easy to fix.
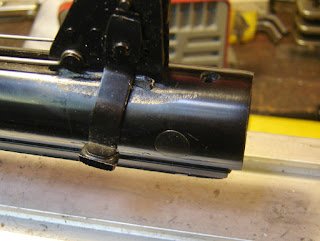
This cross pin holds the spring in the action and needs to be removed.
First this end plug has to come out.
Both the trigger screw and the scope rail screw have to be removed and then the cap comes out.
It was somewhat stuck. I noticed a socket set screw in the center so I unscrewed it. It didn't appear in the schematic, but I supposed it kept the cross pin from sliding.
The end cap, notice the radius that fits against the cross pin.
As you can see it has a tapped center hole.
Monday, August 18, 2008
Crosman 38C, I Spoke Too Soon...
I guess I spoke too soon as I found the 38C had leaked out all of its gas on Sunday morning. So I took it apart again and decided the 38-094 Valve Seal was the likely offender, as it looked a tad discolored and possibly had some cracks.
So I turned up a replacement seal from 95 durometer urethane rubber. It'a bit softer than the seal in the pistol but it should seal well.
I took the time to sand the faces flat and smooth. I replaced it in the gun and it sealed fine. As of this morning it's still holding gas with no evidence of leaking. Teflon, Nylon or Delrin might have worked as well, if it develops a leak again that's what I'll try. But for now it's all fine.
I ordered the 38A027 (piercing pin) and 38-128 (End Seal) from Crosman this morning, 6 of each for about $21.00 w/ shipping. You know, just in case...
Oh, I thought I'd mention that Derrick has a winning entry up in the Crosman "Summer House". I can't hardly wait to hear what he won. It's a great story especially if you like old Crosman guns.
Next project for the blog? I'm working up the nerve to take apart my BSA Superstar with Theoben gas ram. We'll see what happens.
Sunday, August 17, 2008
Two New Crosman 38's
Well, bargain hunter that I am, I bought a lot of airgun parts off of Gunbroker.
This was the first picture in the auction, it's an impressive bunch of parts including a complete trigger assembly from a Crosman 160/180/400, a slew of other Crosman parts and some other odd stuff.
(picture copyright David Banker, 2008)
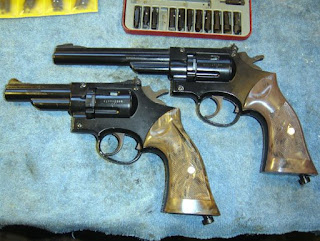
But this is what got my attention, a .177 Crosman 38T and a 38C, complete! The price for the lot was $65.00 w/shipping, which seemed a bargain. There is almost a 3rd 38T in pieces, just a few parts are missing.
(picture copyright David Banker, 2008)
The 38's seemed to function fine, but as is typical, they leaked.
The CO2 cartridge seal on the 38C seemed fine, and indeed it was.
The o-ring 140-058 was replaced with a viton #011 o-ring. All part numbers refer to the valve schematic on the Crosman site.
The 38-130 o-ring was replaced with a #009 o-ring.
38-065 square seal was replaced with a #004 o-ring. It deforms and seals fine when stuffed into the CO2 seal assembly. Indeed I tested the previous 38T I'd resealed using these o-rings and it is still holding gas. All other seals were reused.
The 38T CO2 cartridge seal and 38-130 o-ring weren't in good shape, luckily I had one old CO2 cartridge seal in my box of spare parts. So I was able to reseal it. I will order a bunch of CO2 cartridge seals and piercing pins soon, just in case I run across any more of these lovely old pistols.
The parts are 38A027 (piercing pin) and 38-128 (End Seal), and they are used in the current model Crosman 357-6W and should be available from Crosman directly.
So now my collection includes a .22 38T, a good condition .177 38T in box, two more .177 .38Ts and a .177 38C. I'll be getting rid of one of the 38Ts and looking for a .22 38C (have one in rough shape? I'd love to have it!), because sometimes you set out to collect and other times collection is thrust upon you...